How to Install Wood Handrail and Rosette: Comprehensive Guide
Installing a wood handrail and rosette can enhance the aesthetic of your home while providing safety and support on the stairs. This guide will walk you through the process of mounting a wood rosette and handrail onto a wall. Keep in mind that this guide provides general instructions, so be sure to use your own discretion regarding measurements, angles, and tool choice.
Tools Required:
- Drill & Drill Bit
- Construction Adhesive
Step 1 – Preparing the Wall:
If your home is framed correctly, there should be a stud where the handrail needs to mount. If not, mark the rosette’s position, then cut a rectangular hole in the drywall within the traced area. Coat a 3/4″ plywood strip with construction adhesive, slip it into the hole, and secure it to the drywall’s back. Use a few drywall screws for support. Replace the drywall piece over the hole, securing it with adhesive and screws.
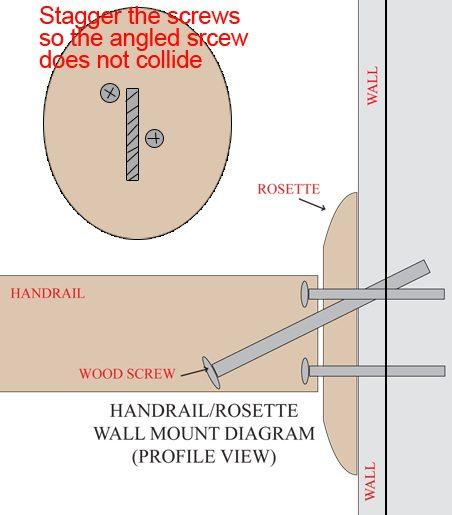
Step 2 – Installing the Rosette:
Apply construction adhesive to the rosette’s back and stick it to the wall. Mark the handrail’s position on the rosette, then use two wood screws to secure the rosette to the wall. Stagger the screws, as another screw will be inserted from the handrail’s bottom, and you don’t want them to collide.
Step 3 – Mounting the Handrail:
Align the handrail with the rosette, apply some construction adhesive, and set the handrail in place. Drill a small hole at the handrail’s bottom, angling it upward through the rosette. Use a three-inch wood screw to secure the handrail to the rosette, continuing into the stud behind the drywall. Your handrail should now be securely installed.
Your handrail should now be secure.