How to Install Iron Newel Posts: Step-by-Step Guide
Installing iron newel posts can add a touch of elegance to your staircase while providing support and stability. This guide will walk you through the process of installing a wrought iron newel post using our iron newel mounting kit. The kit contains a bracket, bolts, set screws, and a shoe to cover the bracket. However, we recommend using a can of epoxy, such as our EPC-7 epoxy can, for a more secure and permanent installation.
Tools Required:
- Epoxy
- Drill & Drill Bits
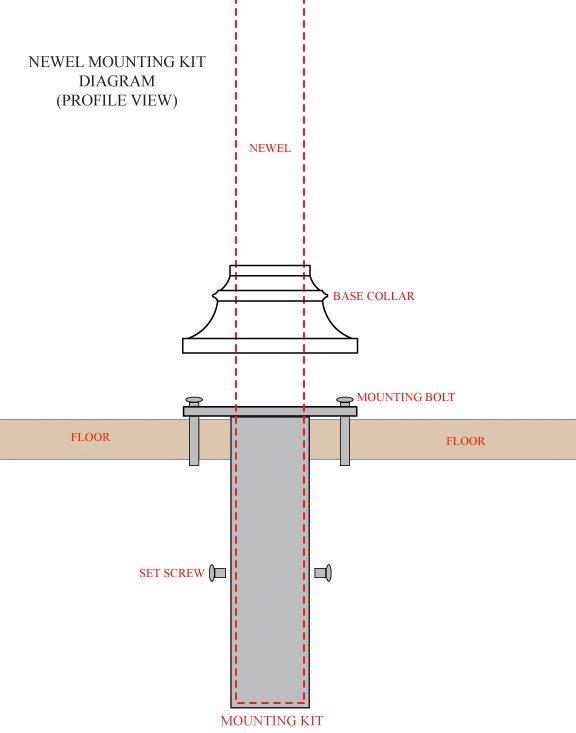
Before you begin, view the illustration diagram at the bottom of the page for reference.
Step 1 – Preparing the Floor:
Drill a hole into the floor where the newel post will be installed. The hole should be just large enough for the bracket to slide into.
Step 2 – Measuring the Newel Post:
Measure the required height of the newel post, from the floor to the bottom of the handrail where it will be installed. Account for the pin top on the newel and the base plate thickness. It’s a good idea to test fit your newel before you epoxy it into place.
Step 3 – Attaching the Bracket:
Slide the base collar onto the newel post, then slide the bracket onto the newel. Ensure you’ve placed the base collar first! Apply epoxy to secure the bracket in place. Alternatively, you may use the set screws, but over time they may damage the powder coating and cause the newel to loosen. We strongly suggest using one can of EPC-7 Epoxy per newel post.
Step 4 – Securing the Newel Post:
Slide the newel with the attached bracket into the hole in the floor. Using the four (4) mounting screws provided, secure the bracket to the floor.
Step 5 – Finishing Touches:
Slide the base collar down to cover the flange, completing the installation process.